Watch this quick video guide to configure your PC settings and avoid common injection errors. Once completed, scroll down to follow the step-by-step installation instructions
Video Guide:
Initial Setup!
1. BIOS Settings
Ensure the following configurations are set in your BIOS:
1. Secure Boot: Set to Disabled. 2. Fast Boot: Set to Disabled. 3. CSM (Compatibility Support Module): Set to Disabled. 4. Virtualization: Set to Enabled. - For Intel Processors: Look for Intel VT-x or Intel Virtualization Technology. - For AMD processors: Look for AMD-V or SVM Mode).
2. Windows Settings
Ensure Hyper-V and the required optional features are active on your operating system (Note: Native Hyper-V requires Windows Pro):
1. Open Features Menu: Press the Windows Key on your keyboard, type "Turn Windows features on or off", and press Enter. 2. Enable Core Features: Scroll through the list, locate the following three items, and check the boxes next to all of them: - Hyper-V - Virtual Machine Platform - Windows Hypervisor Platform 3. Apply & Reboot: Click OK to let Windows download the necessary files, and restart your computer when prompted.
3. Operating System Troubleshooting
If you experience system instability or game crashes while launching, follow these operating system recommendations:
Windows 11 (Latest Versions / 25H2): Some users may experience crashes on the latest versions of Windows 11 (such as 25H2). Reinstalling or downgrading to Windows 11 version 23H2 often resolves these compatibility issues.
(Highly recommended)
Windows 10 (Maximum Stability): For a guarantee of 0 crashes and 0 issues, switching or staying on Windows 10 remains the best choice for absolute stability.
STEP 1
Download & Run the Loader:
Extract & Open: Download the Meta Loader using the provided link. Extract the ZIP/WinRAR contents into a new folder, right-click the loader file, and select Run as administrator.
Automatic Updates: Upon launch, the software will automatically check for updates and download the latest files before moving forward.
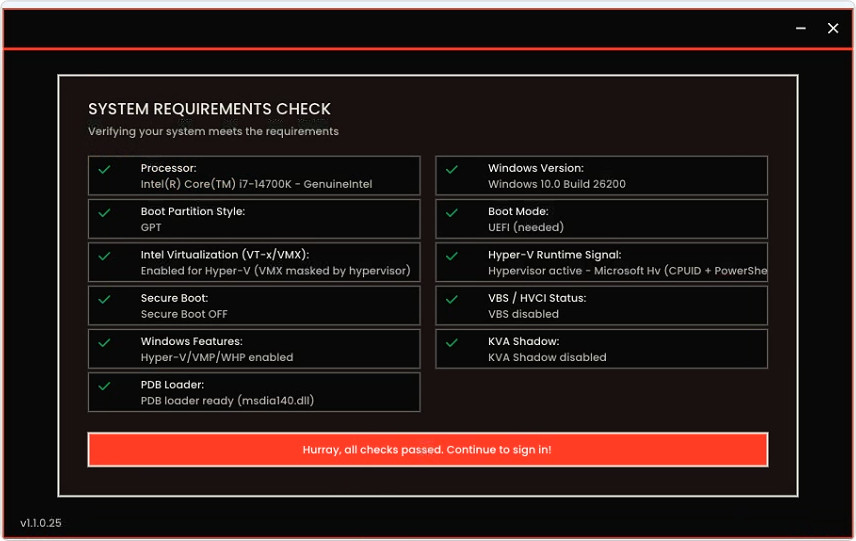
System Check: Once updated, the software will automatically run a System Requirements Check.
⚠️ Important: All compatibility checks must be completely green to guarantee proper functionality and maximum performance.
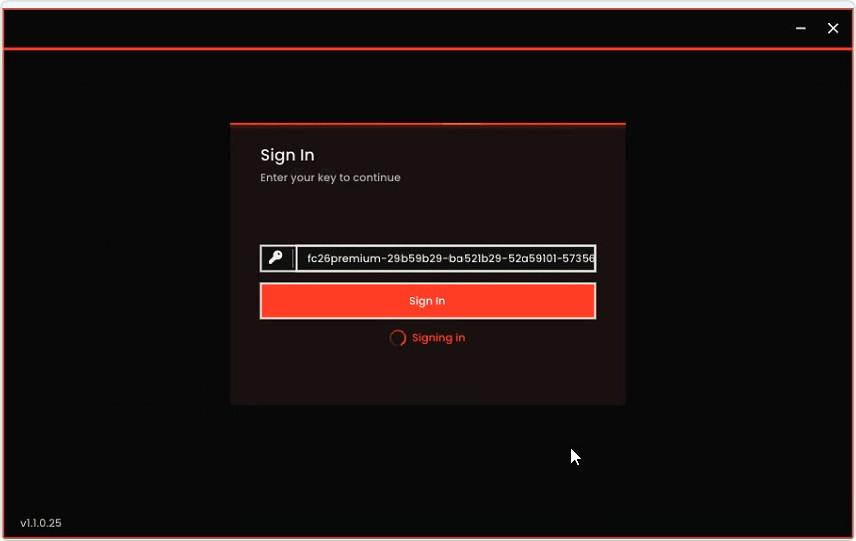
Log In: Once the scan finishes and displays "Hurray, all checks passed", click the red Proceed button to open the login view. Paste your unique License Key into the Sign In text field and click Sign in.
STEP 2
Setup & System Restart:
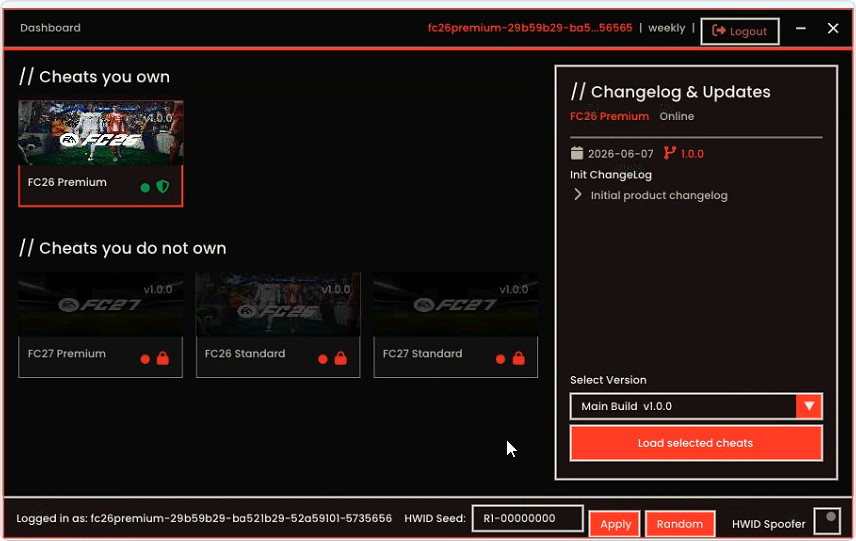
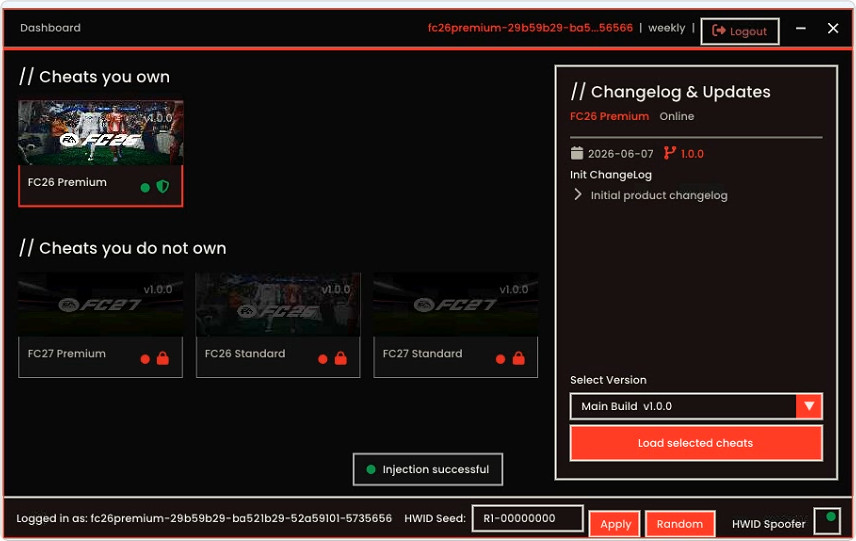
Select Your Build: Navigate the dashboard to view your available software builds. Click the drop-down menu under Select Version to pick your preferred build:
Main Build: Recommended for most users. 1 FPS Fix Build: Only use this build if you experience crashes, freezes, lag, or other performance issues.
Prepare the System: After selecting your build, click Load selected cheats. The loader will begin configuring your system ("Setting up Hypervisor", etc.).
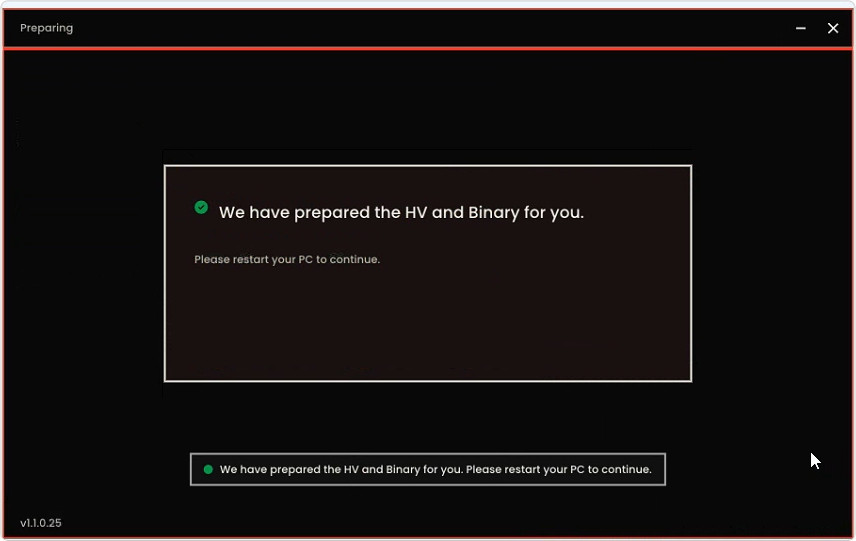
Reboot: When a dialog box appears stating "We have prepared the HV and Binary for you. Please restart your PC to continue", restart your computer.
STEP 3
Game Launch & Injection:
Launch the Game: After your PC reboots, open your game launcher (e.g., Steam, EA App) and launch the game.
Re-run the Loader: Once the game is open, launch the loader application again, log in, select the exact same version you chose in Step 2, and click Load selected cheats.
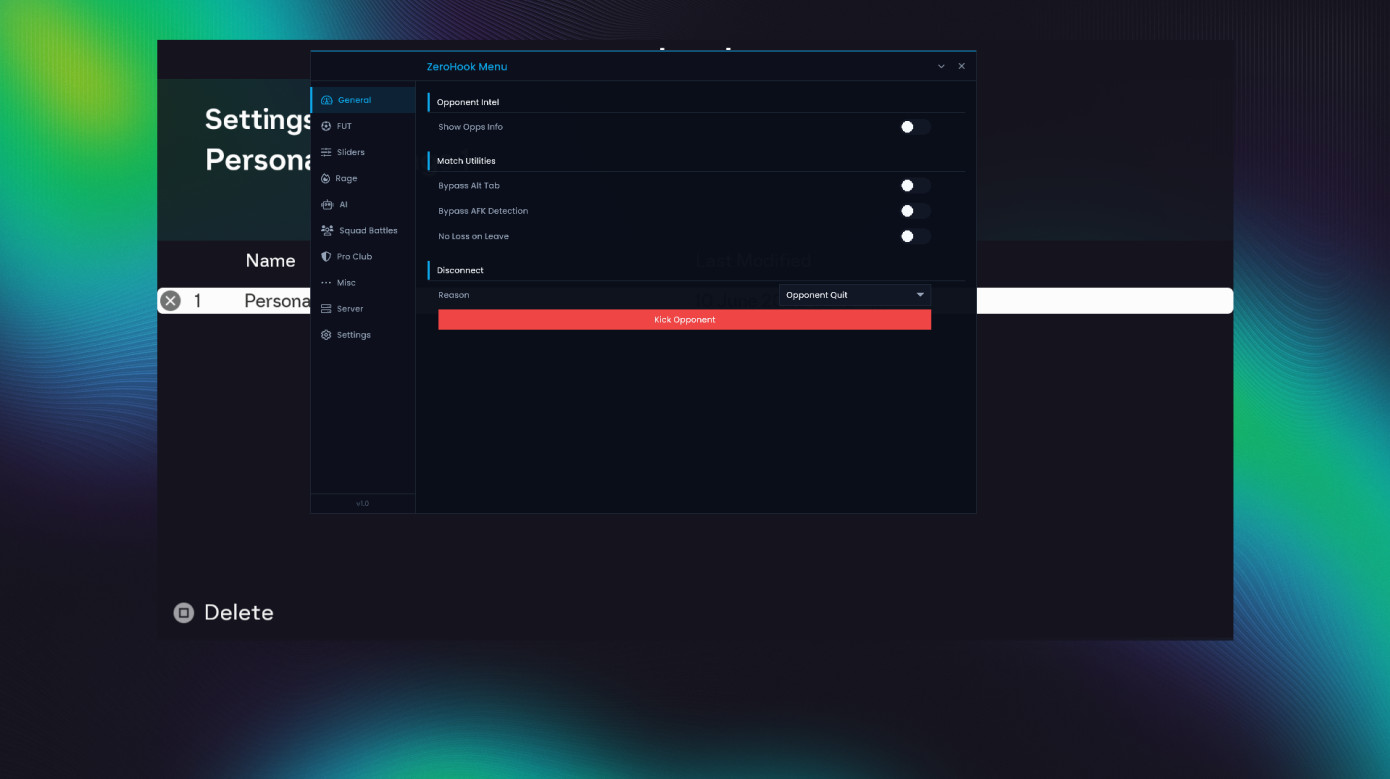
Final Confirmation: As soon as the status updates to "Injection successful", return to your game. The menu overlay will now be active and ready to configure!
TIPS
- If you’re expecting to crash opponents every single match and somehow stay 100% safe from bans — that’s not how it works. - EA has been watching patterns hard this year, so play smart: - Don’t crash or cheese every game. Mix in legit matches and objectives. - Keep your stats looking human — no 90%+ winrate or 20-game win streaks in a row.
- Avoid grinding nonstop divisions or WL if your team isn’t strong enough yet. - Don’t try to force-unlock or bypass the transfer market. That’s a straight-up flag — it’s not worth losing your account. - Do some casual stuff too (moments, SBCs, packs, etc.) so your account doesn’t scream “automation.” - Bottom line: be smart, not greedy.
You can have fun and last months, or go all-in and last a week. Your choice. Stay low-key, stay safe. - STOP trying to unlock the transfer market directly — that’s an instant red flag. EA tracks that harder than anything else. Let it unlock naturally through normal gameplay. - Play slow, mix content, and build your account naturally. Jumping from Division 10 to Elite in a few hours looks suspicious and will get flagged fast. (Stay safe everyone)
Common Fixes
DirectX GPU crash = CAP FPS at 60 in game settings. Failed to install or start driver service = Use VPN
Frequently Asked Questions
Gamepron works as an external cheat, meaning that you must run the game in Borderless mode.
For this Testing we will be running the game in Borderless mode and 1920×1080 resolution.
I am getting "failed to loader the driver" error. How do I fix it?
Having an error or experiencing trouble using the cheat? How do I fix it?
Most issues can be fixed by following the video and initial setup steps above. If you're still having trouble, feel free to contact us using the live chat button at the bottom right of your screen.
Please read and follow this article before using any cheat!